环境准备
hexo需要安装npm和nodejs,部署到github需要安装git
1 | apt-get update |
配置git用户名、邮箱地址和代理
1 | git config --global user.name "xxx" |
配置本地token缓存,便于github更新
1 | git config --global credential.helper store |
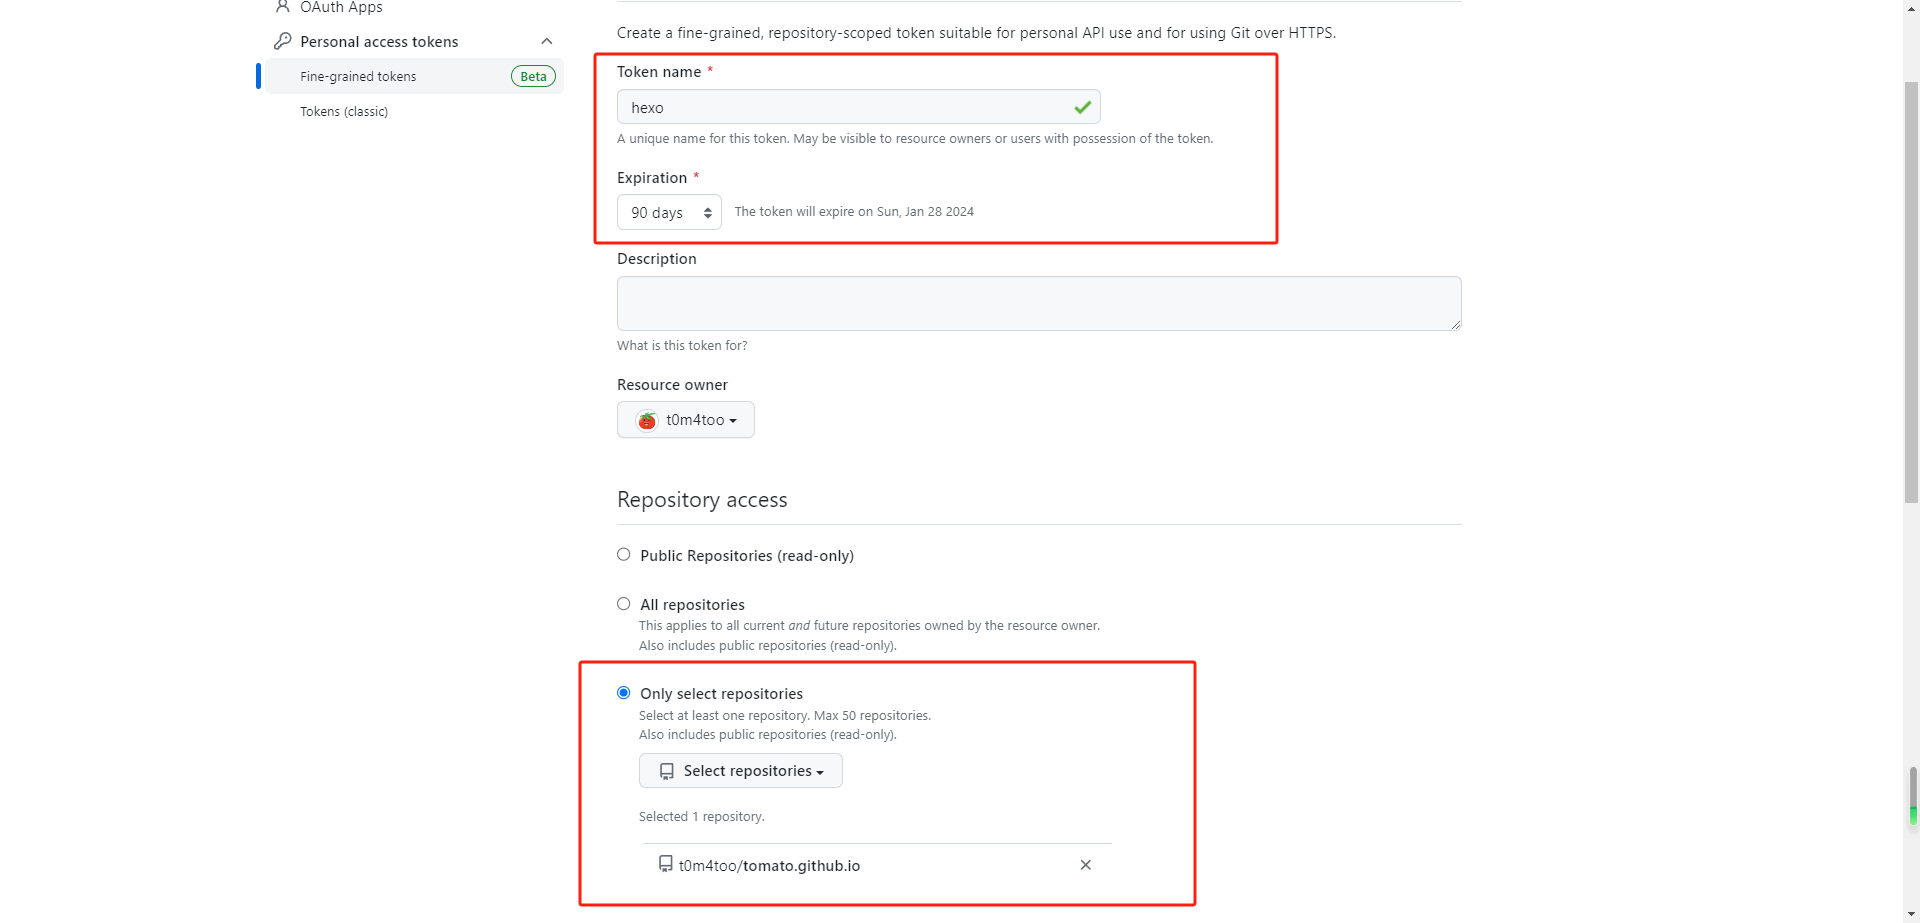
创建github token
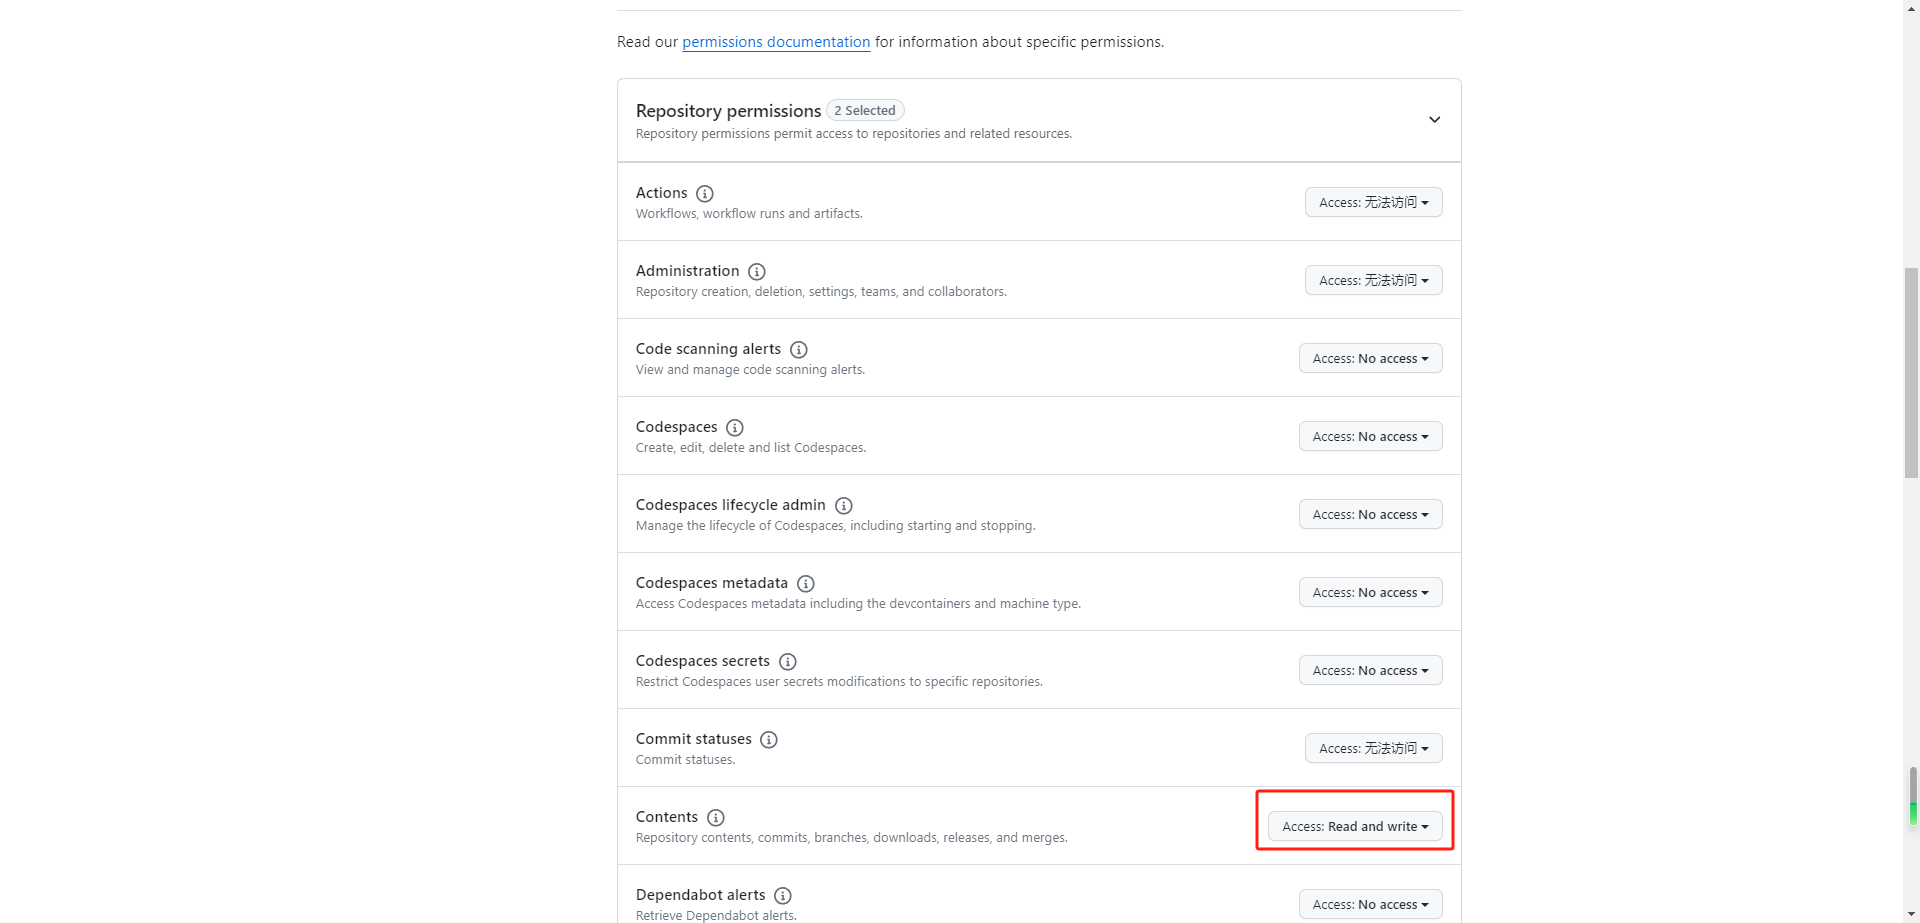
确认有效时间和访问权限
生成token,这里页面刷新或跳转后无法再看到token,可以提前复制一下留着后面用
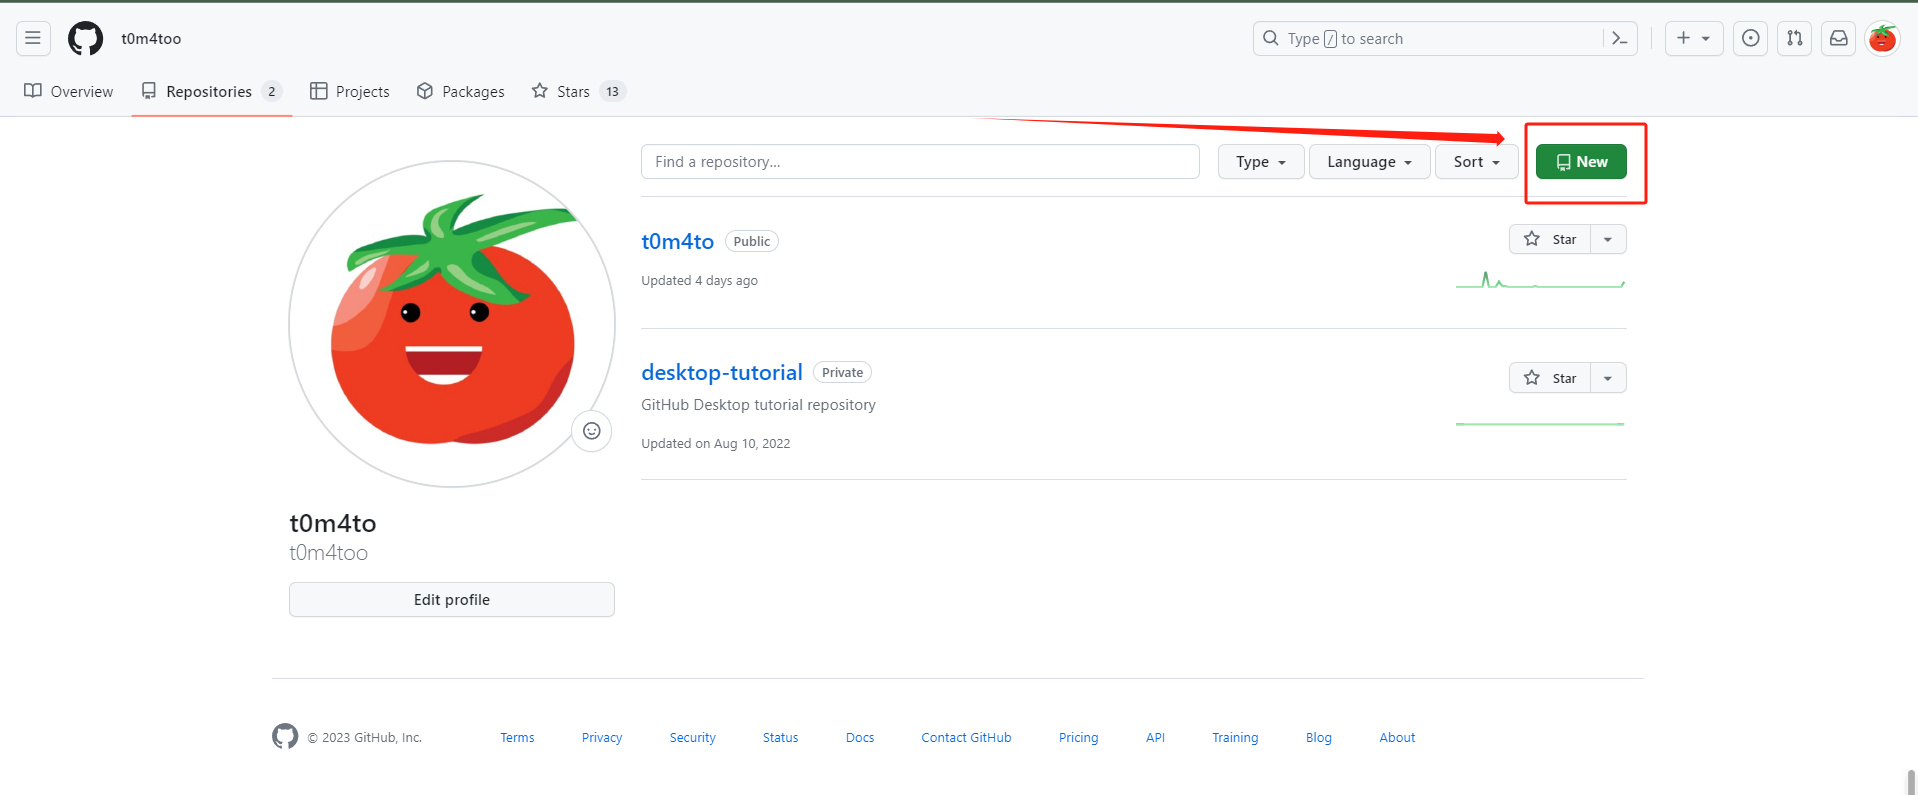
创建仓库
github新建一个repositories
仓库名与github用户id一致,后缀为github.io
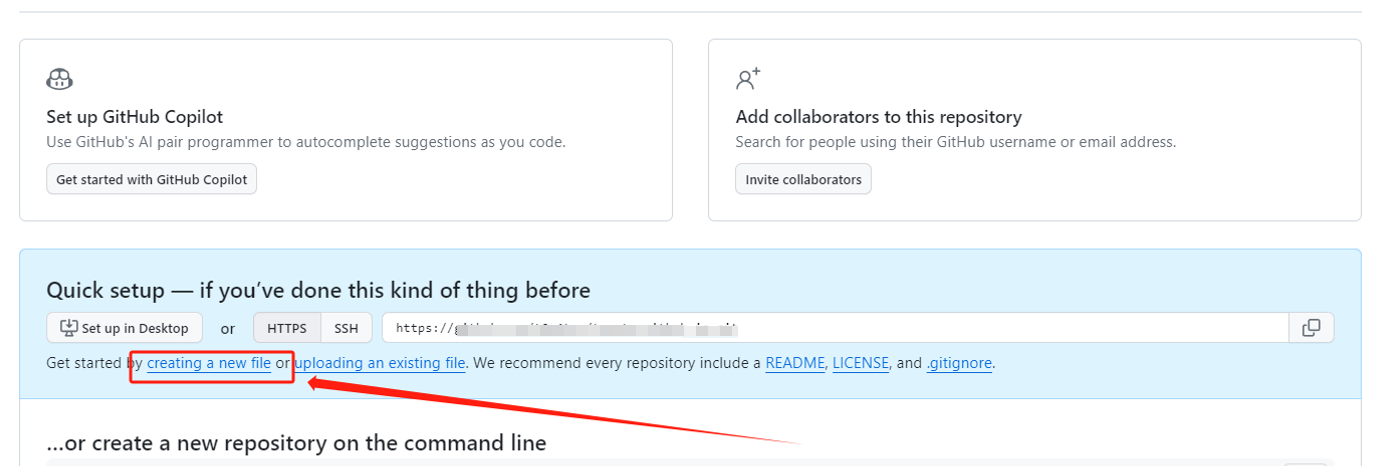
创建主页
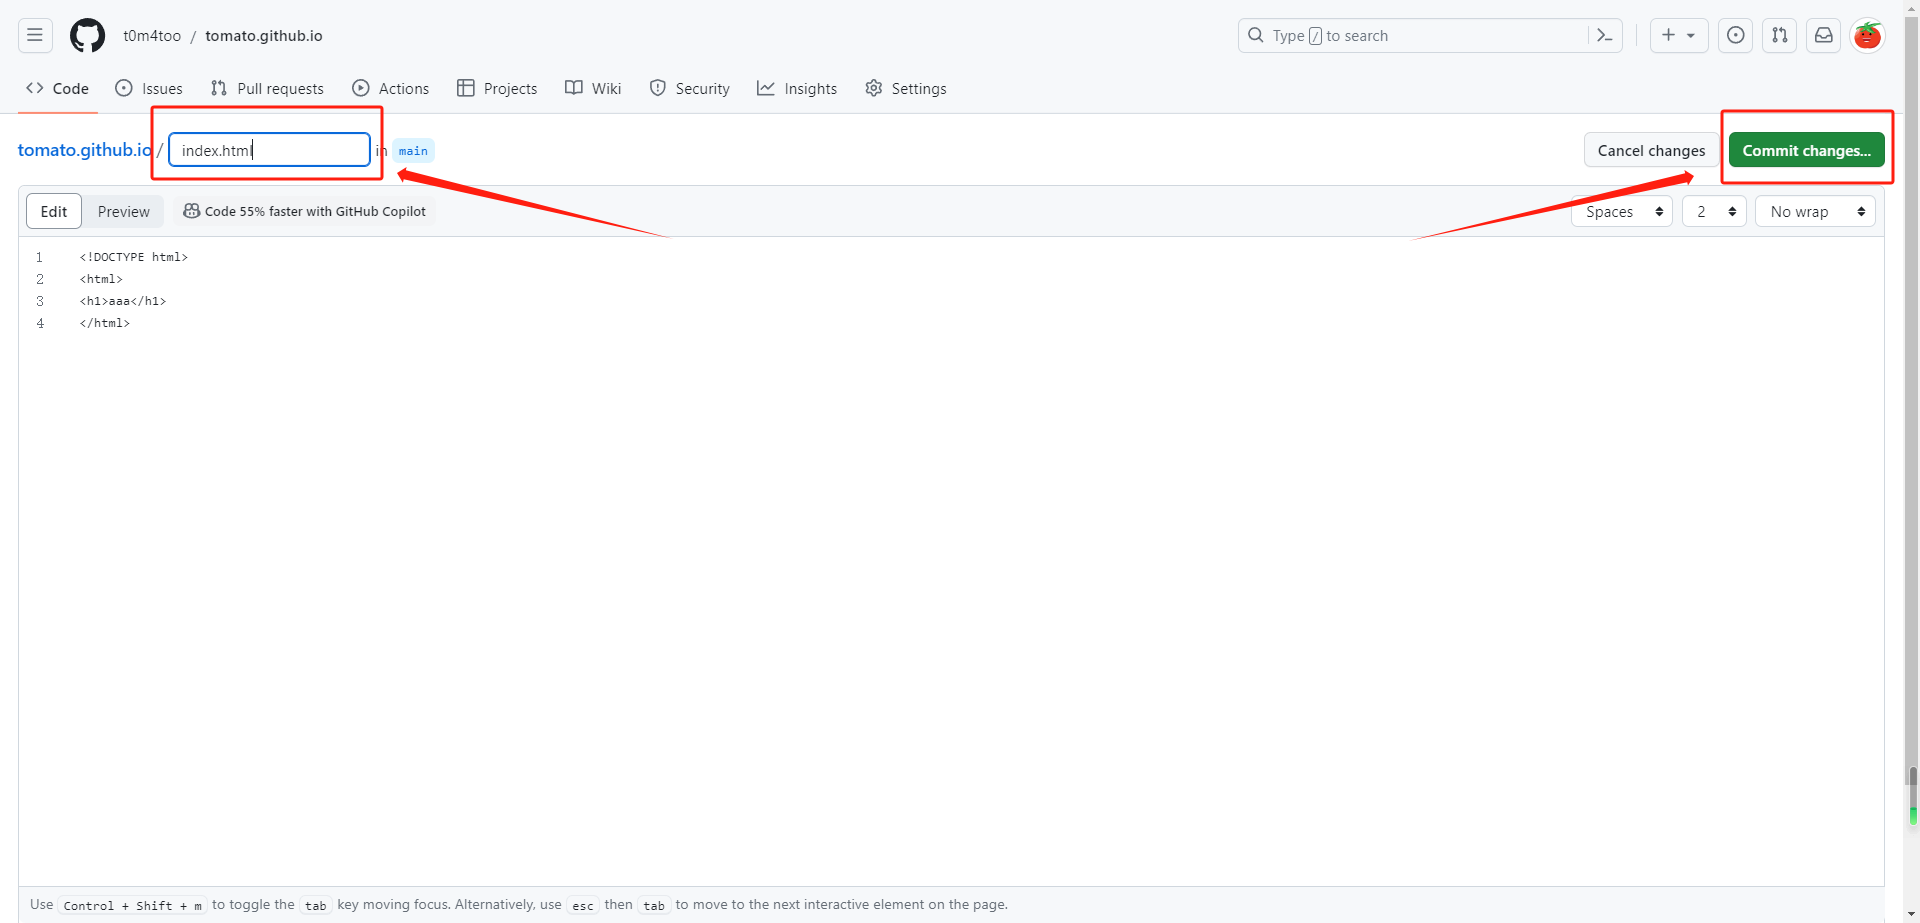
新建一个文件作为网站主页
创建一个index.html并保存,内容随意
本地下载仓库并修改内容同步到github
1 | git clone https://github.com/t0m4too/tomato.github.io.git |
如果推送更新需要回档,可以通过日志中的commit_id回滚
1 | git log |
第一次提交会提示需要输入密码,即上面生成的token,由于设置了本地缓存token,后续提交更新就不需要再次输入token了,提交成功后访问https://t0m4too.github.io/
安装Hexo
安装hexo,初始化并启动服务
1 | npm install -g hexo-cli |
启动服务后访问http://ip:4000即可看到初始页面
同步到github
hexo-deployer-git可以从本地快速推送内容到github
1 | npm install hexo-deployer-git --save |
修改hexo目录下的_config.yml,添加github配置,填入前面生成的token
1 | ## github token |
配置完成后同步到github
1 | hexo g -d |
此时访问https://t0m4too.github.io/,可以看到成功同步
修改主题
下载主题文件到themes目录,如果无法使用git命令,执行git init即可
1 | git init |
在_config.yml修改主题名
1 | # Extensions |
复制主题文件夹下的_config.yml到blog目录重命名为_config.oranges.yml,可以参考https://github.com/zchengsite/hexo-theme-oranges自定义配置,完成后执行hexo g -d同步即可
配置图片路径
1 | npm i hexo-renderer-marked |
修改_config.yml配置
1 | ## 修改post_asset_folder值为true |
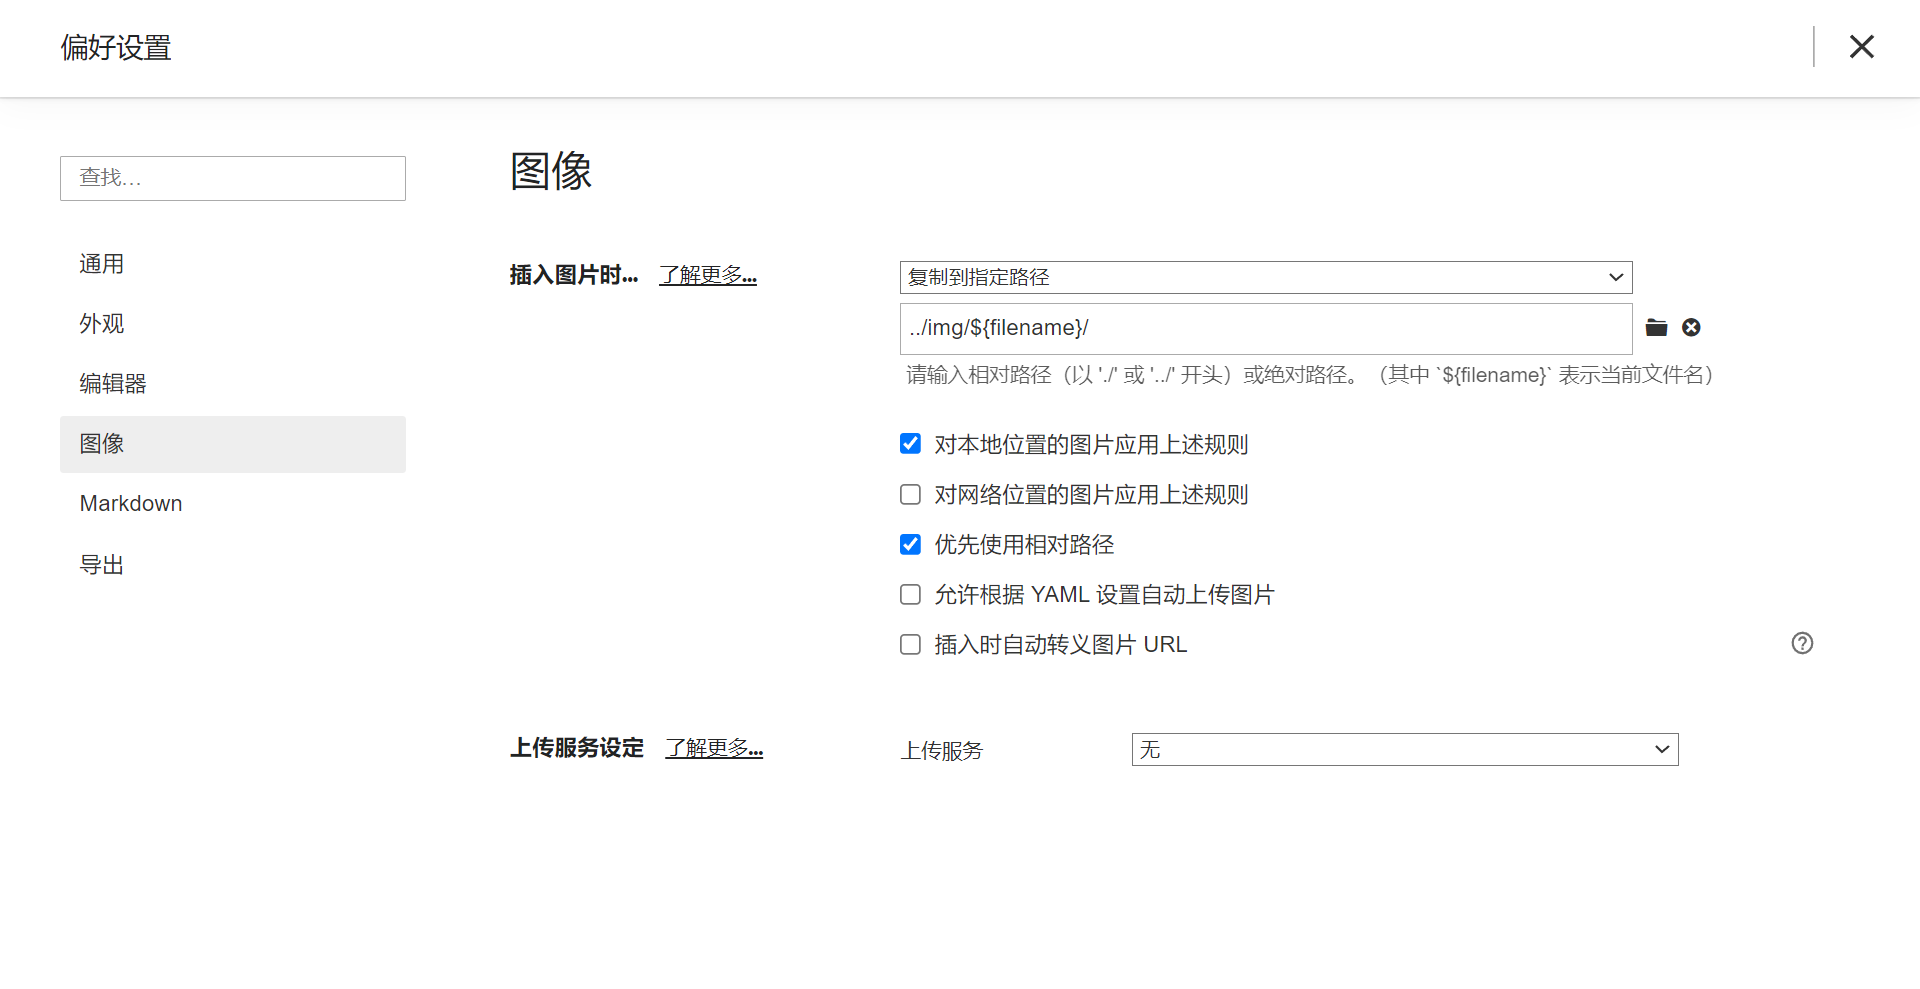
在source目录下创建一个img文件夹,修改typora偏好设置-图像路径../img/${filename}/
绑定自定义域名添加CF加速
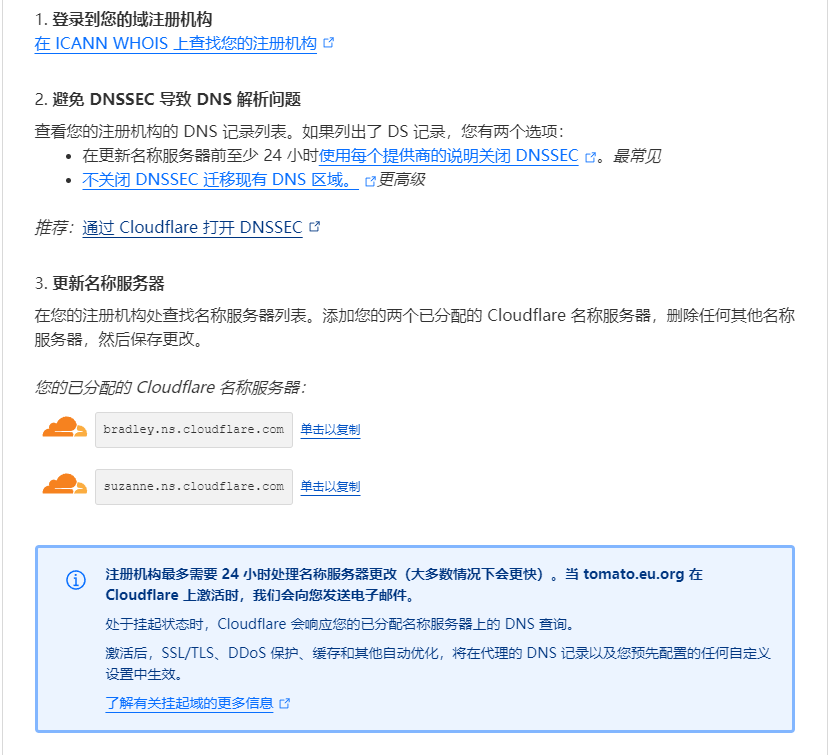
准备一个域名,CF添加站点,并修改nameserver为CF给的地址
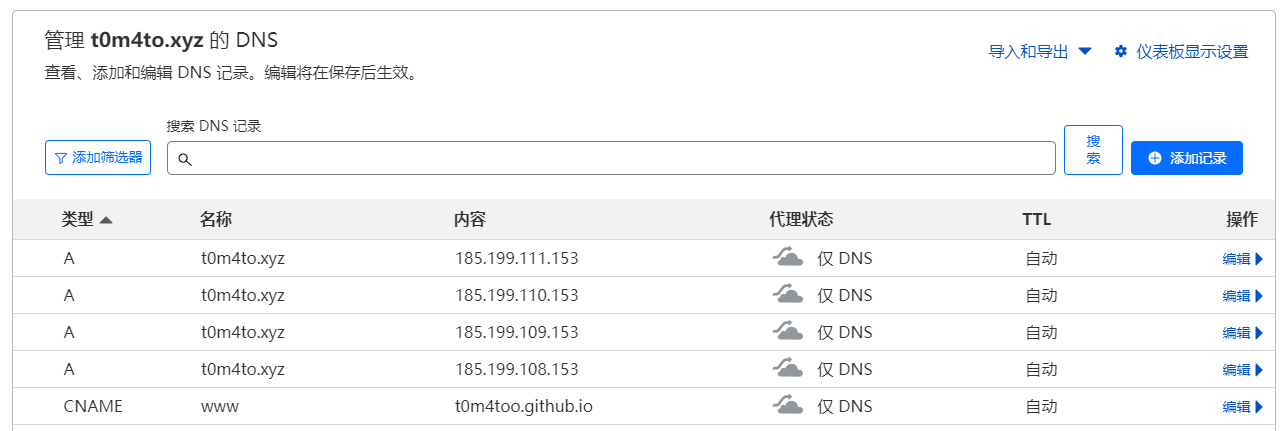
CF可以成功解析后,添加CNAME和A记录
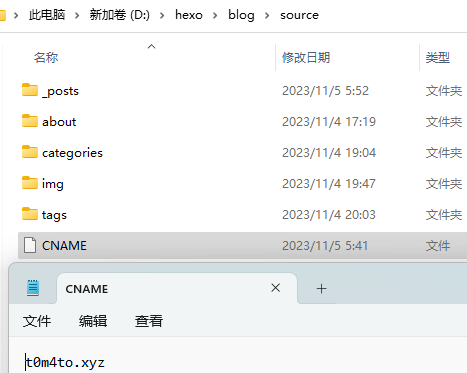
在本地hexo的source目录创建一个CNAME文件,内容为我们自己的域名,后续更新时该文件会自动同步到代码仓,github识别到CNAME文件中的域名后我们就可以通过这个域名访问github page
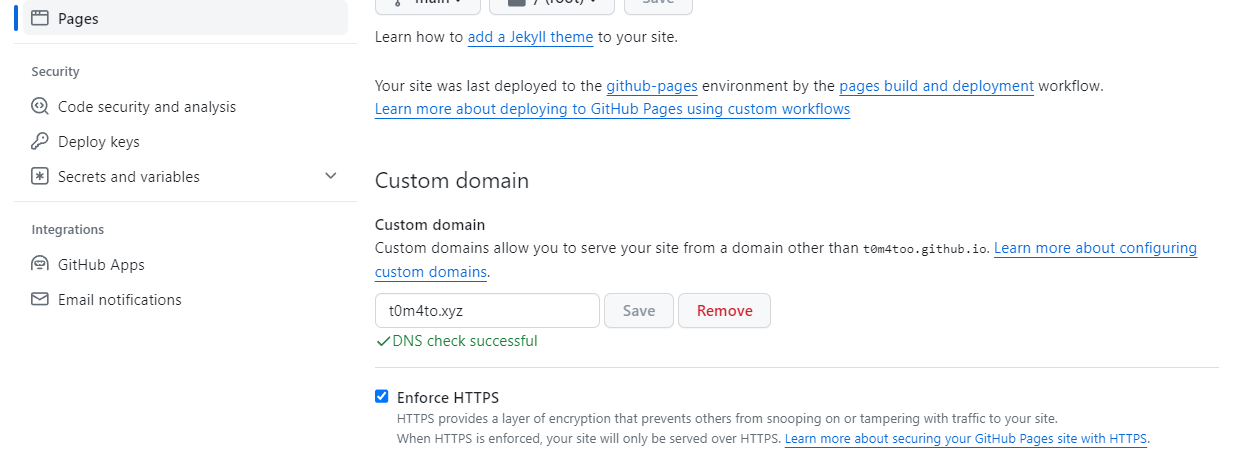
代码仓page中的custom domain会自动获取CNAME文件中的域名,生效如下图
修改文章链接格式
默认格式文章链接为年/月/日/标题格式展示,若标题为中文会生成一大堆字符串编码,可以选择通过插件hexo-abbrlink修改文章链接格式
1 | npm i hexo-abbrlink --save |
修改_config.yml中的permalink

